


08 Export to audio file
Let’s go the most important part of the mix now – the whole process would have been for naught were we not able to export the sound file we have prepared. In many DAW programs audio export has different names (render, bounce, produce, mixdown), but all of them do the very same thing – they make the program save our whole song (more specifically – everything that goes out of the main mixer fader) as an audio file.
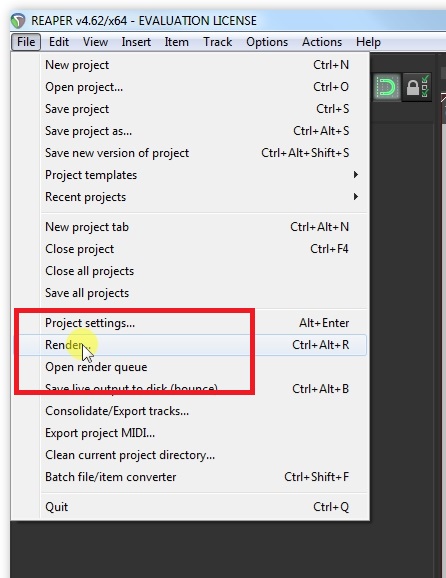
In REAPER the rendering window can be open by clicking the default hotkey combination Ctrl+Alt+R. As we can judge from the number of options it is not necessarily such an easy thing. Apart from the obvious things, like the filename and its destination catalogue we should take an interest in a few more parameters which include:
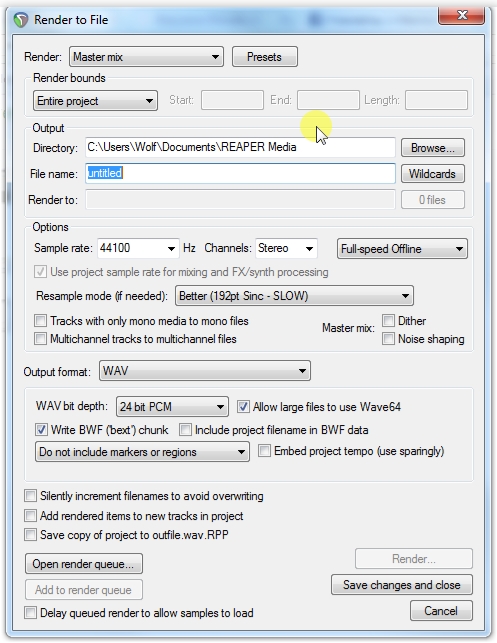
(1) Frequency – we usually do not want to change this parameter, because it is set to the whole project’s frequency by default. However, if it turns out that we need to change it due to what will become of our audio file, we might be forced to change its frequency to make it fit a certain standard. Two most important frequency standards are 44.1kHz, used when recording to a CD or sending the file to the radio and 48kHz when recording on a DVD or for use in media.
(2) Channels – we can choose whether we want to render our recording as mono or as stereo. If we choose mono all of our tracks will be mixed into one. We would choose stereo, unless, of course, we have an important reason to mix into mono.
(3) Bit depth – number of bits of information per sample. We almost always want to leave 24 bits her (or change to 24 bits should the value we encounter be any different).
(4) Output format – the information about what format will our audio be exported into. If we do not have any size limitations we save as .WAV, if we have to keep the output file small for some reason, we go for .MP3.