03 Main window
Now, when we have configured what we were supposed to configure, we can advance to discuss the main workspace.
![]()
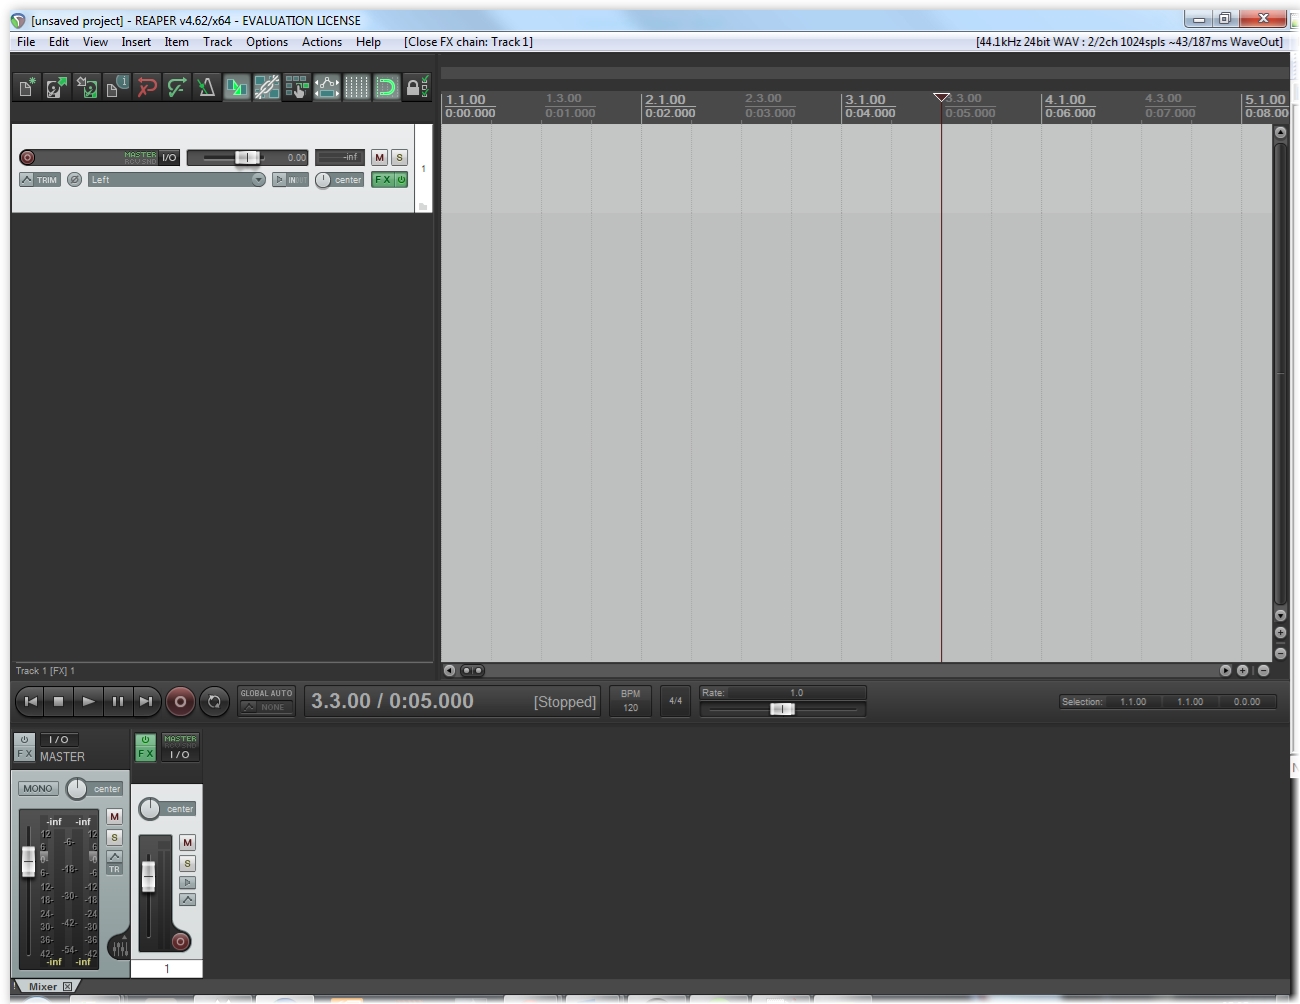
(1) Manu bar – it displays the main menu both on the topside as rows of commands. Both the Windows and Mac version it is used to issue orders.
![]()
(2) Main toolbox – just below the menu bar there is a row of buttons. This is the REAPER software toolbox. Depending on the chosen graphic theme the buttons might differ from those shown in the example. As with most of programs like this more info can be gathered by holding the mouse pointer above the chosen button.
![]()
(3) Timeline – The timeline runs along the top part of the program, to the right of the main toolbox bar. It measures the length of the project and allows the identification of the location of various objects. By default it shows both beats and measures (above) and time in minutes and seconds (below).
(4) Workspace – below the timeline we can see the main workspace. Here we can find the imported objects (audio and/or MIDI), that are the building blocks of our song and are divided into tracks. In this case the workspace holds a single object. We can also put video files, but we will not be discussing it in this tutorial.

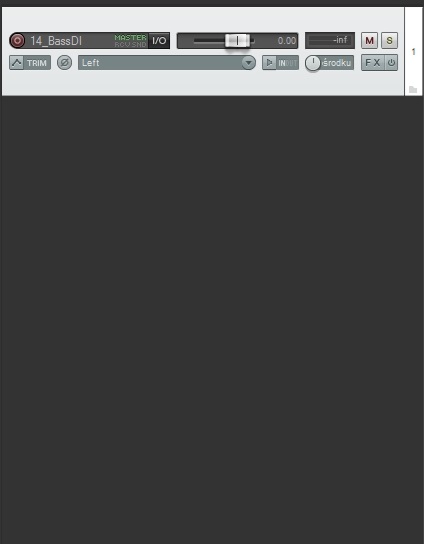
(5) Track control panel – this area is used to control the behavior of audio and MIDI tracks. There can be as many tracks as necessary, as they are only limited by our hardware performance and the DAW that we use. Each track has its own set of buttons and faders.
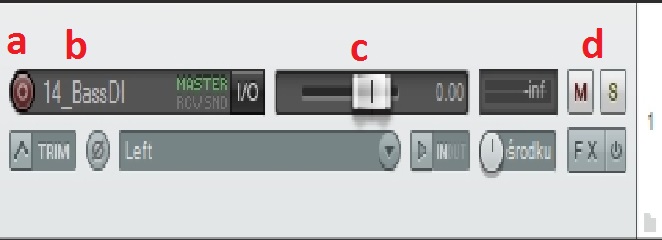
(6) Track – used for controlling the objects that are located on it.
(a) The red button is used for arming the track for recording – when it is active pressing the record button on the transport bar activates recording on this track.
(b) Track’s name – double click to edit.
(c) Volume control allows to change the track’s volume to from very low values up to +12dB by moving the fader.
(d) ‘Mute’ and ‘solo’ allow for, respectively, completely muting the track for the time of recording or to play only this track (and all other with the solo button pressed).
The rest will be discussed in the later parts.
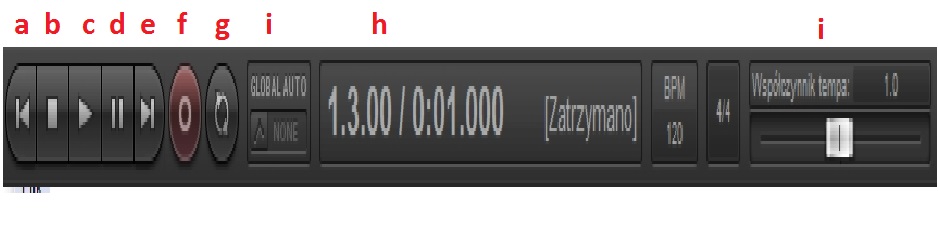
(7) Transport bar – used for controlling the recording and playback of track, as well as their rewinding. I can be toggled on and off by pressing Ctrl+Alt+T. It can be moved and placed wherever we want or docked under the track control panel. The seven visible buttons, from the left, include:
(a) Rewind to the beginning of the project
(b) Stop and rewind to where the recording started (or a big red button that says ‘record’)
(c) Playback
(d) pause
(e) Rewind to project’s end
(f) record
(g) Loop the selected region
(h) The timer showing the current cursor position
(i) The last elements are the playback speed manipulation switch and the global automation skip that will be discussed a bit later.
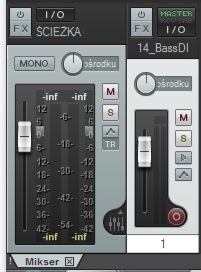
(8) Mixer – on the bottom of the screen we can see the mixer. It displays all the tracks available within the project. It allows us to control what we actually hear while the playback of tracks and objects is active. The mixer can be used interchangeably with the track control panel on the left, but as it is not a necessary element it will not be discussed further in this instruction.